Showing posts with label Still Life. Show all posts

Wednesday, 18 September 2013

Dirty Boot - Still Life

Dirty Boot
Acrylic - A3
 
"Dirty shoes and roses can both be good in the same way." - Vincent Van Gogh

Sunday, 8 September 2013

Lilies - Still Life with Flowers

Lilies
Acrylic - A3
 
'There are always flowers for those who want to see them'
- Henri Matisse 

Friday, 17 May 2013

Drawings: OCA Part 2: Assignment 2

Final Piece
Watercolour and Pencil - A3 

For this assignment I knew I wanted to produce something full of colour, so I started playing around with drawing and sketching different pieces of fruit like onions and chillies, trying out different media as I went.
I initially really liked the idea of the chillies and went ahead with the idea, adding in some green herbs to enhance the colour and using the same view point (from above) that I thought worked well in the fish on plate piece from earlier in the project. I like these pieces but having reviewed the criteria for this assignment again, I was not confident that I had really completed it as well as I could with the composition or colour, probably because I rushed into doing it.
I was not particularly enthusiastic about doing another ink piece at this point so I went back and tried using a combination of pencil and watercolour on some small drawings of fruit. I really liked the way these turned out so I continued with this idea. I also thought a lot longer about the composition I would use, sketching out different ideas first. I added a simple jug that had quite a natural curve like the fruit and eventually a pot plant at the back that gave the arrangement some height and presence. Once I had finalised the composition I produced a couple of studies to make sure I was happy with the lighting and positioning of the all the items and then started on the final piece.
I first sketched the whole thing out in pencil, ensuring that the scale and shading was right. I used the cross-hatching method because I knew it would help to define the shapes well. With the watercolour, I built up layers of separate tones, building it up most where the darker tones were present and leaving the highlighted parts almost bare. It took quite a while to do it this way but I am fairly pleased with the result.

 Study of Red Onions
Watercolour and Biro - A4
 
Initial Studies and Sketches


First result that I was not happy with
 
 
Starting Over with some Watercolour Studies


Playing around with Composition


Practice before Final Piece
Watercolour and Pencil
 Pros:
-          My favourite thing about this piece is definitely the colours; I specifically choose the lemons, limes and satsumas because I thought the colours contrasted well, giving each piece of fruit its own separate form.

-          The cross-hatching works well to define the shapes.
Cons:
-          Despite all the planning for it, I’m still not entirely happy with the composition; I think I preferred it in some of the study pieces as opposed to the final drawing.

-          Looking at it now I think I should have thought more about filling in the background to give the piece a better setting.

Monday, 13 May 2013

Drawings OCA Part 2 V: Project - Drawing Animals - Fish on a Plate

Final Piece - Two Mackerel
Ink - A3
 

The name of this exercise is pretty self explanatory, I had to buy a fish, put it on a plate, draw it, job done.
Not being a fish aficionado, I decided on using a couple of mackerels, I quite liked the silvery blue patterns on their skin and the simple profile they have. I started out with a couple of pencil sketches before trying an ink sketch which I really like. I used a couple of different sized nibs to vary the marks I made, using a very fine nib to produce some detailed cross hatching while reserving the larger ones for the areas of heavier and darker tones.
I decided for my last piece to go for a view looking directly down on to the subject, giving a prominent presence to the plate as well as the fish, allowing them to play off against each other, fighting for the viewers attention. I tried to be bold with the colour and line to match the strong composition using a limited palette of blue and black ink, varying the tones by diluting it. I really wanted to produce something eye-catching for this piece and I am definitely not disappointed with the result.
First Sketch
Pencil - A4

Second Sketch
Pencil - A4

 Mackerel in Blue
Ink - A4
 
Learning Log

What were the main challenges of drawing animals?
It was difficult to capture the proportions and to get the anatomy right quickly enough before the animal moved. It was almost impossible to predict how long the subject was going to stay in the pose or even the same place. There were plenty of times I’d look down at my sketch for a second, only to look up again and find that I no longer had a model as they had scarpered.
The texture of animals also presents its own challenges, I tried my best to pick out the details of the fur on the deer’s and smoothness of the fish scales with varying degrees of success.
Which media did you enjoy using most and which did you feel were the best for the subject matter and why?
I am relatively happy with all the media I employed to complete this exercise. When drawing in Richmond Park and other places, pencils and charcoal lent themselves well to the nature of working outside. I needed to use media that would allow me to work quickly and be able to cover a basic sketch without having to stop to clean brushes or allow anything to dry. Charcoal was especially useful for this as well as conveying the texture of fur fairly well.
I enjoyed using inks as well, first in the park where I produced a couple of rough sketches using a nib pen and blue ink (See http://andrewperugia.blogspot.co.uk/2013/05/drawings-oca-part-2-v-project-drawing.html) I then used inks again for the second exercise of drawing the fish on a plate, where the slightly glossy qualities of the ink were very useful for showing the shiny smooth skin of the fish.
 
Where can you go to draw more animals? Think about the sorts of places that will give you the opportunities for animal drawing. Have you tried drawing a moving animal yet?
I think it would be interesting to try and draw some birds, so by a canal or the local duck pond would be a good place to try and sketch some ducks or swans.
I have not tried drawing a moving animal yet so it would be something to try out in the future.

Saturday, 2 March 2013

Drawings: OCA Part 2 III: Project - Drawing Fruit and Vegetables in Colour - Part III

Exercise: Drawing Using Oil Pastel
& Learning Log
 
 Final Drawing: Apples, Lemons and Baby Tomatoes
Oil Pastel - A3 Yellow Textured Paper
 
For this exercise I first started to play around with the composition, I was using a couple of tangerines and apples to try and get some strong contrast between the greens and oranges. I found a composition that I was happy with and attempted a quick drawing of this with oil pastels on a piece of A4 paper. I like the result and I think the contrast works really well, however there isn’t much range in shape or size so I added some lemons into the arrangement.

I decided to try and use a textured green coloured paper but it soon became apparent after I had started filling in some of the colour that I had made the wrong choice. I did a quick experiment on some textured yellow coloured paper and found this worked much better. I also made a last minute decision to swap the tangerines for some baby tomatoes to vary the range of shapes and sizes a bit more.

I used a chrome yellow to sketch in the main shapes as it was neutral colour that was not too heavy and was apparent in all the pieces of fruit. I then used a Van Dyke Brown to pick out the darkest areas before getting started on the rest. I used a bit of vermillion in the baby tomatoes, yellow ochre in these and the lemons. I found that a yellow grey pastel I had was the perfect tone for the apples as well as the shadow cast by everything. I was aware of how colours from some pieces of fruit were reflected in other, such as the green from the apples being seen in the lemons too, this helped to intensify the colours a bit more, giving a much stronger visual impact. I found that the colours worked really well together and against the yellow paper, it did take quite a while to build up the layers on it but I am very pleased with the final result.
 
Composition studies
Charcoal - A4

Study of apples and Tangerines
Oil Pastel - A4
Learning Log

Your composition should occupy most of the paper’s surface. How much negative space do you have left?
In terms of the way the composition fits onto the page, I would say I have done quite well. The subjects in my pieces sit quite comfortably without feeling like they are crammed onto the paper but also not getting swamped by extra space.
The piece I did of the apple with two lemons using the dip pens is a bit tight as the shadow is quite near the left edge, this is because I didn’t plot out the shadow before I went ahead with it so it could do with shifting to the right a bit.
I purposely left some negative space between the fruit in the final pastel drawing. I did this so that I could get a balance between drawing the pieces of fruit individually as well as allowing them to intersect each other in places.

What have you learned from drawing the details of fruit and vegetables?
I have learnt to try and think about the objects a lot more before I begin to draw them, and to work out how some will work well together and others maybe not so much. It was also interesting to try and capture the different textures of each individual piece of fruit whilst trying to maintain the relationship between them and keep the feeling that they are all part of the same drawing.

What did you find the most challenging about this part of the course?
It was difficult to know whether a composition would really work until I started to actually draw it, this is where doing the sketches for the last piece first really helped.
 
Experiments on Coloured Paper
Oil Pastel - A4


Friday, 1 March 2013

Drawings: OCA Part 2 III: Project - Drawing Fruit and Vegetables in Colour - Part II

Exercise: Using Markers or Dip Pens
 
 Orange, Pear and Lemons
Marker Pens - A4

Apple, Pear, Orange and Lemon
Marker Pens - A4
 
 Apple, Oranges and Lemons
Marker Pens - A4
 
I really enjoyed this exercise, both the process and the results captured my interest. Using coloured marker pens to draw with was a fairly new thing for me, I have never tried sketching anything out with them properly, so it was with a bit of trepidation that I began this exercise. It all turned out fine though and I became engrossed in building up the hatching, using the bold lines that are inevitable with marker pens. I had quite a good range of markers to utilise in these drawings and after some experimentation i dicovered that layering the dark blue and red close to each other formed a great dark tone for the shadowy parts.
 
I also produced a couple of drawings with the use of ink and dip pens. I have used dip pens before in my first assignment, but I stuck to black and sepia then, unlike in this exercise. I approached each drawing differently intentionally. With the first one I washed some rather bold strokes onto the paper with a brush, layering the red over the green where it was darkest and sketching the details in afterwards with a dip pen and black ink. The second drawing I did completely with a dip pen similar to my marker pen pieces, building up the hatching on different planes.
 
 
 Two Apples
Washed Ink and Dip Pens - A4
 
Apple and Lemons
Pen and Ink - A4


Drawings: OCA Part 2 III: Project - Drawing Fruit and Vegetables in Colour

Exercise: Using Hatching to Create Tone
 
 Studies of an Apple and Oranges
Watercolour Pencil - A4
 
 Studies of a Banana and an Apple
Highlighter - A4

Two Oranges and Lime in Wooden Bowl
Colour Pencil - A4
 
Redrawn Close-up of Previous Drawing 

I started this exercise using watercolour pencils in the first piece, beginning with the lighter ones and building the lines with darker ones like the purple and royal blues. I also experimented with highlighters though I can’t say I’m particularly pleased with the result but it was interesting to do.
 
I then positioned two oranges and a lime in a bowl and used colour pencil to draw this arrangement. I placed the bowl near a lamp to cause some strong tonal contrast and I think the highlight with the white pencil show this particularly well.
 
Just for curiosity as to whether this technique would also work well on a larger scale I used a viewfinder on the drawing and produced another one that increases the size of part of the original.


Tuesday, 12 February 2013

Drawings: OCA Part 2 II: Project - Still Life Revisited

Still Life Group in Tone
Oil Pastel A4
 
Because I wasn't entirely happy with my original attempt at this exercise as seen in my last post i decided to revisit it and have another go.
This time I stuck to cooler colours at the bluer end of the spectrum but used the same compositon so that i could compare the two results once finished. I definitely prefer this one, i find it a lot fresher and it feels much more harmonious.

Monday, 11 February 2013

Drawings: OCA Part 2 II: Project - Still Life

 Still Life Group using Line
Fine Liner and wash A3
 
Still Life Group in Tone
Oil Pastel A4
 
What aspects of each drawing have been successful, and what did you have problems with?
I really like the still life group using line, especially the mushroom and onion, these definitely worked well because of their shapes and textures. Unfortunately I feel the melon in the background was less successful, I found the texture was hard to capture correctly.
I can’t say the drawing of the still life group in tone is one that I particularly like but it did at least make me think about the tones more, as a positive I do like the colours I chose.
Did you manage to get a sense of depth in your drawings? What elements of the drawings and still life groups helped to create that sense?
The first drawing has a bit of depth to it and I think this was helped by the composition and the way that the objects build up as they go further into the drawing. If I’m honest I think the second piece is definitely lacking this.
What difficulties were created by being restricted to line or tone?
I found the main difficulty was that I wanted to be creative but the rules were quite prohibitive; I had to learn not to indulge the urge to be spontaneous. I also think that it is quite hard to accurately describe the objects without a combination of the two elements of line and tone.


Tuesday, 5 February 2013

Drawings: OCA - Assignment One

Natural Still Life
Brown and Black Indian Ink on A2 Paper
 
Made Objects Still Life
Ink and Wash on A2 Paper
 
I decided to try the made objects for my first drawing, I took the idea of things found in my pockets and thought about drawing keys as they have a range of interesting, very clean cut unnatural shapes. I tried sketching out a few studies and found that employing the hatching method worked very well and helped emphasise the shapes of the keys. I added a few more objects that worked well with the keys such as the locks and whistle, playing around and trying an ink and wash drawing. I liked the variety but found the result very scattered so I added the watch to bring a focal point to the drawing.
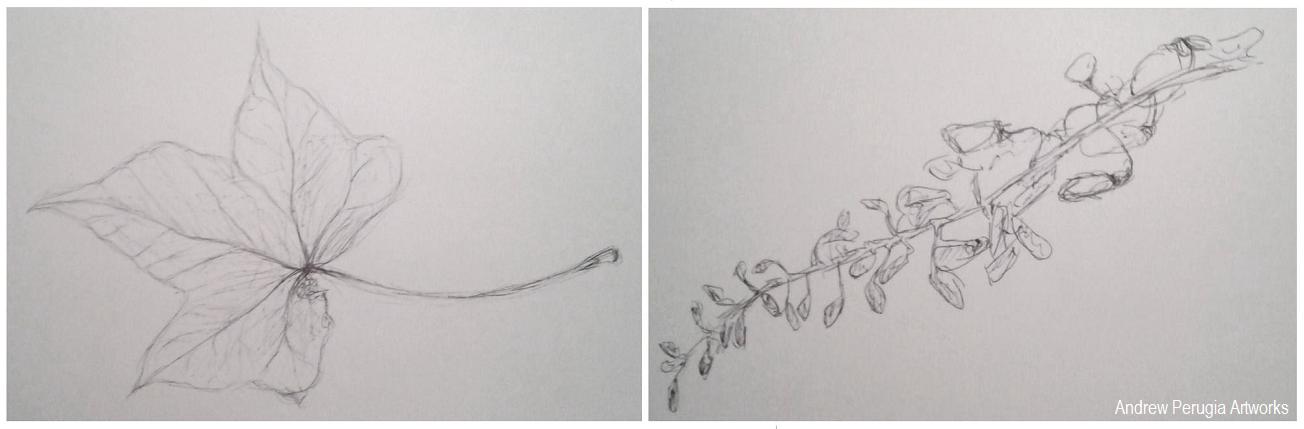
I saved the Natural forms drawing till last and started by doing some studies of different leaves. I found I liked the Ivy leaves best so I went back and drew a few in brown and black Indian inks with a dip pen; I really liked the result the earthy colours worked well. I gathered some more natural objects and sketched these all individually. I liked the Cyprus seeds as these worked well with the dip pen and inks and I thought the small details the wisteria flower heads would complement the broad ivy leaves. I played around with the composition to try and fully cover the paper, literally branching into all the corners.
Sketchbook Pages- Playing around with the composition.
 
Did you do enough preliminary work before starting work on your final pieces?
I think I could have done with doing a bit more playing around with the composition for my first piece of the made objects, I did quite a bit for the second piece of the natural objects, and I feel this arrangement maybe turned out better because of it. It really helped to make sure I was using the right materials though.
Do your large drawings give an accurate interpretation of the still life groups? If not, what went wrong?
I believe they are fairly accurate, the dip pens and earthy brown colour really helped to achieve the right feel in the natural forms. Some of the keys I’m not entirely happy with as the shapes are a little off in places.
Did you make a good selection of objects or did you try to include too much? Would you change the arrangements of objects if you were to start again?
Looking back I think I may have fallen into the trap of using too many objects, I have to contradict myself though because I also quite like them for it. If changed them at all I would try and make objects fill all the corners of the page better.
Do your drawings fit well on the paper or could they be improved by working on a larger sheet of paper?
I think the scale of these two pieces is quite good, it worked well with the media but if I was using something bolder like pastels I might have struggled a bit more.
Did you have problems with drawing or find hatching too difficult?
I really went for it with the hatching on the first drawing of the made objects, it was a lot of work on all the different keys and locks but I think I pulled it off. I held back and tried to do it with a bit more subtlety on the second piece, and again I think it worked.
 
 Study of a chub key and playing with ink and wash for Made objects
 
 Studies of an Ivy Leaf and Wisteria Flower heads.
 
Indian Ink Studies of Ivy Leaves and Cyprus Seeds

Wednesday, 8 August 2012

Drawings: OCA Project - Still Life


Composition of Natural Objects.
Indian Ink on A4 Paper

Do you think it is easier to suggest three dimensions on man-made or natural objects?

It is definitely easier to define the shapes of man-made objects in three-dimensions because they are made up of regular geometric shapes with corners and faces. Natural objects such as fruit and plants do not conform to these regularities and tend to have lumps and bumps that make a subject harder to define.

How did you create a sense of solidity in your composition?

I used black Indian ink applied with a brush to lay down some bold defining lines. These lines helped to give the drawing a sense of depth as the black seemed dense and heavy against the white of the paper. Then I added water to some of the black ink to dilute it for the mid-tone wash; helping to bind the dark and light tones of the drawing together.

Do you think changing the arrangement of your composition makes a difference to your approach and the way you create a sense of form?

I think it was good to experiment with different compositions before starting on the final drawing as it helped me to find an interesting layout for my objects that was still comfortable to draw. It also helped me to see how different objects could interact and play off each other to convey the sense of form.

How did you decide to position yourself in relation to the objects?

I decided I wanted to view the objects from a slightly elevated position this gave me a good view of all the objects together and of the shadows cast by the light coming in from the right hand side. I also liked this position because the fruit formed a sort of triangular arrangement and the flower stems seemed intertwine around all the gaps.

Photos of sketchbook pages


Still life sketches of made objects & Natural object composition arrangements.
Both in Black Ballpoint Pen

Monday, 30 July 2012

Drawings: OCA Project - Reflected Light

Study of light reflected from one object to another.
Charcoal and Chalk on A3 Sugar Paper.


Shadows and reflected light and shade.
Charcoal on A2 Paper.

What are the difficulties in separating cast shadow from reflected light and shade?
When using both charcoal and chalk in the first drawing, it was difficult using both these tonally opposite mediums and still trying to create a range of tones without the whole drawing just turning into a smudgy grey mess. I attempted to get over this problem by using the blue of the paper as a mid-tone thus separating the two. The cast shadow had much more solidity and a much harder quality to it so I used just charcoal when trying to portray these bits, most noticeably in the shading on the surface upon which the objects are standing.
The reflected shadow and light follows the contours of the objects. How have you shown this in your drawing?
When applying the charcoal or chalk I followed the shape of the object, allowing the contours to show and define themselves. Like ont he bowel in the first picture and especially on the pepper grinder in the second picture.


Friday, 23 December 2011

Drawings: Jugs and Jars

Biro on A4 Cartridge Paper

This is a still life piece that I have just done for a drawing project on my art course. I was focusing on the ellipses of the lids and cylindrical shapes of the various vessels.
I used some biros pens to create this piece, varying the tones by use of cross hatching. I used the hatching strokes almost like contours, following the shapes of the cylinders; I find this helps to give the objects some body.
After finishing this piece I then altered my view of the objects slightly and created a second piece from my new position to see how the shapes and ellipses changed. I think I prefer the first piece but I found the process of doing the second one quite interesting.
By the way, I realise that there aren’t any jugs in this piece but that is the name of the exercise.

Biro on A4 Cartridge Paper

Sunday, 11 December 2011

Still Life: Fruit in Ink

Indian Ink in Sketchbook

This is a piece I created quite a while ago of some fruit I arranged on a chopping board, I was reminded of it because of the artwork I put up a few days ago where I was looking at the artist Paul Cézanne. I actually did this piece in a sketchbook, quite evident from the page fold in the middle, but I wanted to put it up as a still life piece.
I did this piece of work using Indian ink where I started by adding some of the details using a fine nib, concentrating solely on the shapes, following the body of the fruit almost like creating contours. I then mixed some water with a couple of drops of ink that I put on as a wash to try and create a mid tone. It is a very simple piece but I think it makes quite a nice piece of art.

Friday, 25 November 2011

Sketchbook: Still Life Watercolour

Watercolour on A5 Cartridge Paper

This is the first Still life piece I have featured on this blog and the first that I have done for quite a while. I used a small branch and a sprig of something I discovered in my garden; trying to avoid a very clichĂ© still life I arranged the two bits in a rather ugly plastic soft drinks bottle. Although I didn’t want it to look like a typical still life, I did want it to allude to one, which I think this has achieved.
I used watercolours on this piece as it was only intended as a quick study to begin with. I limited my palette to mostly cool colours, pairing the hues of blue and green in the bottle and the green sprig on the left. The only warm colours used were a touch of red brown and yellow ochre in the branch on the right.